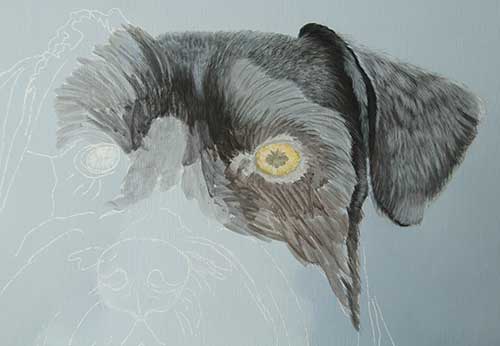
Here I am again….still making progress. I’ve moved into the forehead area and got rid of that ‘divot’ that I noticed in the last photo. That is one thing I have found very helpful….taking photos of my work as it progresses. It is amazing what you discover in a photograph that you somehow missed when looking directly at the painting. I’m just so focused on the details that sometimes I overlook the “whole”. Next, I once again start laying in washes of color to establish values. I’m using a #3 round brush to do this…stroking in the direction of the hair growth. That is why the hairs, at this point, look big and chunky. Big and chunky are fine at this point because I’m establishing a base for the finer more delicate hairs that will be added over this base layer.
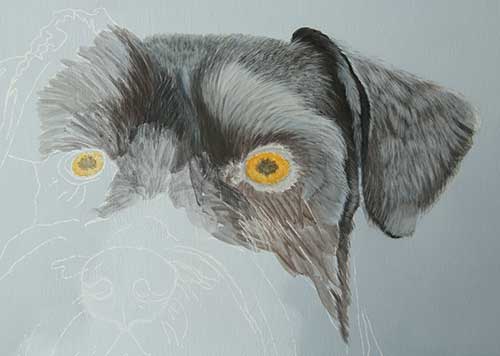
In this photo….you can see that I have started to add those finer hairs. Keep in mind that I am still building values here. So I will usually start with the darker values first, then on to the mid-values, adding the lighter values last. This is a process I sometimes repeat several times….playing with different values and colors until I’m happy with it. I normally do not add the lightest highlight values until more of the painting is completed…..that way I can ‘balance’ the painting as a whole.
The eyes…I’m sure many of you are wondering about those yellow eyes! Buster has very deep brown eyes, but if you look closely at my reference photo you will see a glint or two of a lighter value from the daylight reflecting in those beautiful brown eyes. I’m all about building depth and layers of color and in this case I’m starting with a lighter value and then building to the dark…making sure I leave a bit of that lighter value showing through the layers to give it that “sparkle”!
Just to let ya know….I’m working on a separate tutorial that will go into more detail on how I achieve that “lifelike” texture in the fur! It will include information on the brushes and my layering techniques with plenty of photos and maybe a video! Bit of a learning curve involved on the video….but something I’ve been wanting to add to my blog for a while! Fingers crossed it all comes together!

Seeing your work unfold and in progress is so inspiring. I’m definitely looking forward to the tutorial. Such a sweet dog face – :-)!
Hi Marci….I’m glad you are enjoying seeing the painting develop. Thank you for the lovely compliment…..it is a blessing to know you find my work inspiring.
Wow! What detail! I enjoy seeing artist’s processes. Thanks for sharing! I was very nervous to do my own first video but was glad to get it under my belt. Cheers!
Thanks for stopping by Heather!
I can’t wait to see the tutorial – it is so interesting to watch this come to life. A video would be great – I want to feel more at ease in doing videos too! I think they are great tools!
They are Vickie….I love a good video and its so much easier to understand a new technique if you can actually “see” it as it happens.
Debbie! A video! This is so exciting! I really can’t wait for your tutorial. There’s a great learning curve to make it, but for a great purpose. I learn so much from you and your works-in-progress. For instance, I had no idea that yellow glints of light were created with paint that’s underneath everything else. I would have thought the reflections would float on top of everything else. Who knew? Thanks so much for sharing this. (Buster is adorable!)
Harmony, you can work in reverse and “float the highlight” on top, but I have found it sometimes looks a little flat. Once all the shadow layers are in; however, I usually do go back and add a little more sparkle. It is much easier to achieve that sparkle if you are working on a light surface rather then dark! Hope that makes sense.
Thanks Kelly….I’m definitely nervous about the video, but I really do want to try and add to my blog!
Yes thank you for explaining about the eyes! I was wondering if they’d stay as they were. This is just so cool to see this guy unfold and come to life. Looking forward to that video – good for you.